
Run Your Car-Hauling Operation in TruckTA
Follow a job through preparation, dispatch, driver work, financial close, and owner-operator access, with a practice checkpoint for each part of the six-part TruckTA course.
By TruckTA Team · Product guidance
Reviewed by TruckTA ·
This tutorial uses an AI-generated voice. The video and article explain the same reviewed TruckTA workflow.
Put the workflow to work
Solve the task with TruckTA
In this article
A saved load isn’t the whole handoff. Dispatch needs to know the intended driver can open it. The office needs to see the completed driver work. Accounting needs the right payer, supporting records, and a separately reviewed driver settlement. This companion to “Run your car-hauling operation in TruckTA” follows those connections through the six-part course.
Use this guide alongside the video for TruckTA team training with owners, dispatchers, drivers, accounting staff, and owner-operators. The course uses fictional data, and its example rates are not universal. Follow the six sections in order, pause to practice, and use the checks below to confirm each handoff.
Prepare the operation
Before dispatching, identify the person, driver record, equipment, documents, compensation, and assignment history that support the work. These aren’t interchangeable checks. A person having company access doesn’t answer whether the driver has the required app connection, and a usable driver profile doesn’t answer which truck the driver used on a particular day.
Start with access and the driver profile. Confirm that the person has the right company access and that the driver has a usable profile with the required app connection. Keep the check specific to the person who will perform the work. The later dispatch handoff depends on the intended driver being able to open the released job, not simply on someone in the office being able to see it.
Next, check that the equipment and documents match the operation. Review compensation with its effective date, then review assignment history for the days the driver uses the truck. The date matters in both places: the course calls for the correct compensation effective date and a truck assignment history that identifies the equipment for the relevant days.
Treat preparation as the foundation for the later screens, not a separate administrative exercise. If one connection is unclear, name it before moving ahead. “Driver setup needs attention” is less useful than identifying whether the gap concerns access, the app connection, compensation timing, or the truck assignment.
Practice check: Pause before dispatch. Identify the intended person and driver profile, confirm the app connection, and point to the equipment, documents, compensation effective date, and truck assignment history that support the work.
Build and dispatch the job
The dispatch handoff has a clear finish line: the saved load is accurate, the assignment reflects the operating plan, and the intended driver can open the released work. Check all three. Saving the job answers only part of the question; it doesn’t replace confirming the assignment or checking access from the driver’s side.
Review the saved load as the record the team will keep using. Then compare the assignment with the plan for operating that job. Keep the review attached to the actual load and intended driver rather than relying on a general statement that dispatch is ready. The course’s handoff is about whether this saved job is ready for this person.
Finish by confirming that the driver can open the released work. This is the point where office preparation meets driver execution. If the intended driver cannot open it, the dispatch handoff has not met the course’s stated completion test, even if the office sees an accurate saved load.
The next part follows pickup, condition evidence, communication with the office, and delivery. Those new facts change the same load record rather than creating a separate version of the job. During dispatch training, keep returning to that record so the team can follow what changed and what the next person must verify.
Practice check: Have dispatch identify the saved load and its assignment. Have the intended driver confirm that the released work opens. If either side cannot verify its part, name the missing connection instead of calling the handoff complete.
Complete the driver work
Begin in the correct driver account with the assigned job. Verify the vehicle before moving through the inspection work. The course then calls for reviewing inspection evidence and recording the driver signature and the representative’s response. Keep those checks distinct: the representative’s response is something to record, not something to assume.

Follow the guided camera prompts and required vehicle views, but review what was actually saved. The training emulator demonstrates why that matters. It displays a camera preview yet saves black images, and the failure is logged. A visible preview therefore does not establish that the resulting inspection images are usable.
After the report work, wait for the report and milestone to finish. Then confirm that the office can see the result. Don’t collapse these into one assumption. Finishing an action on the driver’s side and confirming visibility on the office side are separate parts of the handoff described in the course.
At delivery, compare against pickup. Keep the earlier condition evidence in the review rather than treating delivery as an unrelated inspection. If work was performed offline, confirm it after reconnecting. The course does not treat offline completion alone as the final verification; the next person still needs a clear, verified result.
Use the Driver App portion of the training to distinguish an attempted action from a confirmed outcome. The goal isn’t merely to move through the controls. It’s to leave the office able to verify what happened on the assigned job, with any evidence gap identified.
Practice check: Confirm the account, job, and vehicle. Explain why the emulator’s black photos fail the evidence check, then identify the report completion, milestone completion, and office visibility checks. Include reconnection confirmation if practicing offline work.
Close the financial loop
Start with the payer, not just the payment terms. Bill To must identify the customer or broker you will invoice. The course warns that a typed broker name alone may not link a saved contact. A name appearing in the load is therefore not enough to establish that the billing details are ready.
If Bill To is missing, follow the demonstrated correction: open Overview, edit Broker and Agent, choose the saved contact, and save. Return to Money and confirm the billing details. That return check matters because the task is to establish the correct billing information, not merely to finish editing a field.
Keep load invoicing and customer payments separate from driver pay during the review. In the fictional finance example, invoice history is recorded and two customer payment records cover the $1,200 balance. Costs have their own records. The separate driver settlement is reviewed on its own; it is not the customer’s invoice balance.
For the settlement, open Finance Center, then Driver Settlements. In Pay run, choose the correct Monday-through-Sunday week and select the driver. Check the load lines and actual delivery dates. This is a review of the selected driver’s work in the selected period, so keep both the person and the dates in view.
The illustrative course calculation uses $1,200 gross and an applicable percentage rate of 25%, producing $300 before deductions and adjustments. Those figures demonstrate the calculation; they are not universal rates or a recommendation for your compensation arrangement. Compare the example with the preparation section’s requirement to check the correct compensation effective date.
The finance handoff should distinguish delivery support, invoice history, customer payment records, cost records, and the reviewed driver settlement. The course records fictional customer receipts of $500 and $700, leaving a zero balance. It separately follows the $300 driver settlement from draft through approval to recorded payment. These are training records; no real funds were transferred.
Practice check: Verify Bill To, identify the invoice and customer payment records, and review the selected settlement week, driver, load lines, and actual delivery dates. Explain the illustrative $300 calculation. For any unresolved item, name the record, reason, and person responsible for the next step.
Work with owner-operators
Keep role, fleet membership, driver linkage, and load assignment as four separate questions. The course makes two useful distinctions: a driver can work a load without being the fleet owner, and a fleet member can view scoped financial information without receiving staff permissions. Don’t use one relationship as shorthand for all the others.

For a mixed fleet, make each handoff identify the person, workspace, fleet, and record being discussed. That gives the next person something specific to verify. Saying that an owner can see a job is less precise than identifying which person, in which workspace, is reviewing which fleet’s record.
Owner Portal access and the Driver App connection are separate settings on a person’s company login. An owner who does not drive may need only the portal. An owner who also drives may need both. The course presents these as different access needs, not as one setting that automatically answers both.
Before completing setup, review the fleet, driver record, and selected role so each workspace opens for the right purpose. Keep that review separate from whether a particular load has been assigned. The practical lesson is to verify the relationship you need rather than infer it from another relationship that happens to be correct.
Practice check: Identify the person, fleet, driver linkage, role, and load assignment separately. Explain whether the person needs Owner Portal access, a Driver App connection, or both, then name the workspace and record involved in the handoff.
Exceptions and daily review
Close the day by separating verified results from unresolved work. Preparation, dispatch, driver execution, finance, and owner-operator scope connect, but a gap in one area still needs its own explanation. The course’s rule is direct: when evidence is missing, stop, name the gap, and route it to the right team.
Keep optional workflows distinct. Warehouse steps are separate milestones. AI intake is review-first, and staff AI is shaped by permissions. Communications require current provider health. Data Health points to corrections. These are boundaries for checking the work, not evidence that every optional workflow was executed during the demonstration.
Be equally careful with communication status. The course identifies provider health as something communications need; this companion does not establish that a message was sent. Use the provider or other relevant record to support the statement you hand off rather than turning an intended action into a completed one.
For each end-of-day exception, include five facts: record, current state, evidence checked, blocker, and owner of the next action. Use the load, driver, equipment, fleet, document, or provider record that proves the statement. Keep it short, but specific enough that the receiving person knows what remains unresolved.
Practice check: Choose one unresolved item from the training exercise. Give its record, current state, evidence checked, blocker, and next-action owner. If you cannot support a statement with the relevant record, identify it as an unverified point rather than a completed outcome.
Watch the six-part course, pause at each practice checkpoint, and verify each handoff in the appropriate workspace. Follow the same job from preparation through financial review, keeping fictional demonstration records separate from evidence you would accept on a real load.
Read the video transcript
A load arrives. Your dispatcher checks the details, finds the right driver, and plans the work. Your driver needs clear instructions and a way to report what happened. After delivery, the office needs to invoice the customer, record payment, and prepare accurate settlements. This training follows that work from beginning to end in TruckTA. We will use fictional sample data and follow the same job through the office workspace, the Driver App, and the Owner Portal. You will see what each person does, what they hand to the next person, and how to check that the work is complete. Pause whenever you want to practice, and use the chapters to return to a particular task. The course has six parts. Prepare the operation. Build and dispatch the job. Complete the driver's work. Close the financial loop. Work with owner-operators. Then handle exceptions and review the day. We will begin with the records and settings that make the rest of the workflow reliable. Open the Dashboard to see where the day starts. The Dashboard brings together several questions. How much active work do we have? Which loads still need a driver? Are there open problems? Which deliveries still need an invoice? Start with the question you are trying to answer. Each number opens its underlying records. Review those records to understand what needs attention. Look at Dispatch today. Pickups and deliveries have their own timing. An appointment in the schedule is a plan; an actual pickup or delivery records what happened. When work is overdue or a date looks wrong, open the underlying load and check its details before changing the plan. The schedule alone does not prove completion. Outstanding and Expiring soon point to different follow-up work. Accounting may need to review an unpaid balance. Operations may need a current document. Use the shortcut for the issue you are handling, then identify the exact record. We will return to these same areas after the sample load has been delivered and its financial work is complete. Move to the sidebar and let the labels open. Loads, Drivers, Equipment, and Contacts lead to the main operating records. Finance Center and Compliance Center group related tasks. Settings contains company configuration and access. Learn the route to a page as well as its name, so another person can repeat the same steps without guessing where a screen came from. The search field at the top helps you find records and Help. Search for a specific load reference, vehicle identification number, driver, or piece of equipment when you know what you need. Check the result's type and identity before opening it. Similar names are common in a busy operation, and choosing the wrong record can make a small correction affect the wrong job. Open Help when a field or workflow needs explanation. Use the guidance alongside the screen you are working on. Your company's permissions and settings determine which controls are available to you. If a teammate has an action that you cannot see, ask the person who manages access to check your role and permission instead of sharing another person's login. Open Company Profile from the sidebar. Confirm that you are working in the correct company. Review the business name, contact information, and company details that will appear in the records you prepare. Keep the operations time zone accurate. Dates used for dispatch, assignment history, and financial review need a consistent business context across the team. The company's FMCSA information and the company's own profile are related, but they are not the same editing surface. Review official information and any proposed differences before applying a change. A refreshed result does not mean every field should be replaced. The person responsible for the profile should decide which supported updates accurately describe the company. Open Documents from the sidebar to locate company documents and their current versions. Use the correct document category and check expiration details where they apply. A file with a familiar name may still be an older version. Before sharing documents in a business workflow, verify the intended files and recipient rather than assuming that every stored document belongs in the packet. Open Settings, then select Users under People and access. This is where the company manages logins, invitations, and the relationships that connect people to their work. Staff members, drivers, and fleet owners may need different workspaces. Start with the person's actual responsibility, then review the access that responsibility requires. An invitation gives the intended person a way to establish their own access. Confirm the email address and selected access before sending it. Search the existing people first. If the person already has a company login, review that account instead of creating another one. A second login can make it harder to understand which record or workspace the person is using. A Driver profile describes the person doing the driving. The Driver App login is the account linked to that profile. An Owner Portal membership gives access to an authorized fleet. These are separate relationships. An owner-operator may use both workspaces, but a driver link alone does not grant Owner Portal access, and portal access alone does not create a driver link. From the sidebar, open Compliance Center and select Onboarding. Select New packet. The preparation steps are Driver, Terms, and Preview and Send. For someone who already has a Driver profile, choose Select existing driver and search first. For a new applicant, Create new driver starts an applicant packet; it does not finish the Driver profile at this point. Check the recipient's name, email address, phone number, and language preference. Use the classification your company has approved. Where contractor equipment information is requested, confirm who provides the truck and trailer. These choices affect the packet you are preparing. They should reflect the company's reviewed arrangement with this person, not a value copied from another driver because it was convenient. In Terms, review the agreement template, packet wording, and the values that will become part of this driver's packet. Use company-approved terms. Select Create Packet and Preview when the draft is ready to inspect. Open the generated documents and read them before delivery. Unanswered driver sections may use sample information in this preview; the preview is not a completed or signed packet. The recipient completes the required information and submits the packet through the invitation workflow. Your company then reviews the answers, documents, and signature evidence. Request corrections when something is incomplete. Approval and signing are controlled review steps, and applying the reviewed packet to a Driver profile is a separate action. Submission alone does not create or update that profile. Open Drivers from the sidebar and select the driver. Check the profile's current status, contact details, license information, and required documents. A person's profile and their app account should describe the same person. The document-attention information helps identify missing or expired items, but someone still needs to inspect and maintain the underlying records. Open the driver's Pay tab to review compensation. Pay needs an effective date as well as a rate or amount. In our percentage example, the applicable rate is twenty-five percent. That number is simply the training arrangement. When your company changes compensation, use the dated change workflow so earlier deliveries keep the rate that applied when they occurred. Open Equipment from the sidebar. Select the truck or trailer and review its identity, status, and documents. Capacity must describe the actual trailer you plan to use. If a record is inactive or unavailable for work, do not rely on it merely because it still exists in the system. Use equipment that matches the operating plan. Open the truck's Assignments tab. Assignment history records who drove the truck and when. Enter the dates that were true, review the impact, and confirm the change only when it is correct. A current assignment does not automatically explain an older delivery. Truck and fleet reporting use the assignment that covers the financial date of the load. When a truck changes drivers, close the earlier assignment with the appropriate end date before starting the next one. Do not create overlapping assignments to make both people look current. If Truck Assignment Check reports missing or ambiguous coverage, review the dated history. Correct the underlying relationship before relying on the affected truck or fleet totals. Pause on the driver's profile and trace the setup before the next job. Which company is this person working in? Is the correct login connected to the Driver profile? Which truck and trailer are assigned? What dates cover that assignment? Answer from the visible records. A familiar name alone does not establish all of those relationships. Next, inspect the document attention and compensation information. Find one item that explains what the team should check before work begins. Separate an operational document issue from an account-access issue and a pay-setting issue. Different people may handle those items, and changing one record will not necessarily resolve the others. Here is the answer pattern: name the record, name the missing or incorrect fact, and name who should review it. For example, a missing assignment date belongs in assignment history. A missing login connection belongs in access management. An expired document belongs in the document workflow. Use the source that actually owns the fact. When you return to the Dashboard, decide which items need action now and which are already explained. A summary is useful for finding work, but the underlying record is how you verify it. This habit prevents the team from changing several unrelated settings because one card or total looked unexpected. Before we dispatch, stop and name the links we need. The person has the right company access. The driver has a usable profile and the required app connection. Equipment and documents match the operation. Compensation has the correct effective date. Assignment history identifies the truck for the days the driver uses it. These are the foundations behind the later screens. Here is the practice question. A driver has a profile and a load is assigned to them, but they cannot see the work on their phone. Where would you look? Check the login link, the company policy, and whether the work has been sent to the driver. An assignment is not the same as releasing a load to the Driver App. We now have the people and records needed to explain the job. In the next part, we will check the business contact, create the load, review the route and money fields, choose capacity, and make the handoff to the driver. Keep the same load reference in view as we move between screens. That reference connects the rest of the training. Open Contacts from the sidebar. Before entering a broker or customer again, search the saved records. Check the business identity, contact person, phone number, and billing information. The pickup location, delivery location, broker, and payer may be different parties. Keep those roles clear so the driver reaches the right person and accounting sends the invoice to the right place. Open the broker you intend to use and review the details that matter to this job. A broker's default payment terms can help prepare a new load, but you still need to compare them with the agreement for this shipment. If a contact has changed, correct the appropriate saved record rather than putting an unrelated person's details into the driver's instructions. From the sidebar, open Compliance Center and then FMCSA Status. Enter a company identifier or name and choose the expected role. Our fictional broker is a training example, so we will not present it as an officially verified business. For a real job, match the exact entity and review the returned record before relying on it. Recent checks shared with your company can be empty, as they are in this fictional example. When a real check exists, inspect its date, role, status, and supporting evidence before making a business decision. A green item does not answer every question; the person responsible for accepting the work still decides whether the company should proceed. Open Loads from the sidebar and select Add load. We will enter the primary example manually so you can see the information that other entry methods also need. Start with the vehicle and the load reference. Our reference is RL-TRAIN-1001. Keep that reference consistent with the supporting dispatch paperwork so the office and driver can identify the same job. Check the vehicle year, make, model, and identification number against the source. Describe its operating condition accurately. A vehicle that needs special handling changes the planning conversation. Do not mark it as running simply to finish the form. If the identification does not match the paperwork or the physical vehicle, stop and resolve the mismatch before treating the details as confirmed. Enter the planned pickup and delivery dates. These dates tell the team what is scheduled. They do not prove that a pickup or delivery happened. Use the company's operations time zone and the actual agreement for the job. Later, the driver or authorized staff will record the actual milestones, and we will check those facts separately. In Status and Payment, enter the agreed amount: one thousand two hundred dollars. Choose the payment term Net Seven, then select A C H or electronic check as the expected method. These fields describe the agreement. They do not record a customer payment. Review both fields before continuing to the vehicle and stops. Check the terms even when a value is already selected. TruckTA can prepare defaults from the company or broker, but the job's agreed terms still matter. Review imported and prefilled values just as carefully as values you type. Choose the correct supported term before saving so accounting can rely on the agreement recorded here. Move to the Pickup section. Select the correct saved location or enter its details. Confirm the company name, address, city, state, postal code, contact name, and phone number. Read the finished address as a whole. An autocomplete suggestion can help with entry, but choosing a suggestion is not proof that it is the correct gate or pickup location. Next, complete Delivery. Confirm that the destination and its contact belong to this shipment. Review any receiving hours, gate instructions, or appointment information that the company maintains for the location. A reusable location note and a one-time instruction for this load serve different purposes. Keep the instruction in the place where the next person will expect to find it. Use Driver notes for information the driver needs to perform the work. Make instructions short and specific: where to enter, who to contact, and which detail requires attention. Keep private office comments out of driver-facing instructions. Before saving, reread the notes from the driver's perspective and remove ambiguity that would otherwise require a phone call at the gate. If the job includes more than one vehicle, review each vehicle record. Confirm the identity, condition, stops, and dates that apply to each one. Then check the total agreed load amount. A multi-vehicle job must not become duplicate revenue simply because the same job appears in several vehicle rows. Follow the record relationships when you review it later. Add the appropriate supporting document and select its correct category. A rate confirmation, gate pass, and bill of lading are different records. Check the selected file before uploading it. Clear document categories help the driver find operating paperwork and help accounting find the evidence needed to bill the customer after delivery. Before selecting Create Load, review the job from top to bottom. Confirm the reference, vehicles, route, planned dates, amount, terms, contacts, and instructions. Saving creates the record that the rest of the team will use. The review is worth a few seconds because correcting a wrong detail after dispatch can affect several people and screens. Select Create Load and wait for the saved load to open. Confirm its reference and the details you just entered. This is the first visible result to check: the job exists as a saved record. Creating it does not mean it has been picked up, delivered, invoiced, or paid. Those are later steps with their own evidence. Return to Loads through the sidebar and select Smart import. For a dispatch sheet or rate confirmation, review the document and the information TruckTA prepares from it. Check vehicle identity, stops, dates, amount, and terms before confirming. Import saves typing; it does not remove your responsibility to compare the proposed load with its source. If a value is missing, ambiguous, or wrong, correct it in the review rather than guessing what the document meant. Keep the original paperwork attached where the workflow supports it. The imported result should be a load you can explain and verify, not simply a form that happened to complete without an error. Use a separate example to practice import. Do not import the primary job a second time merely to demonstrate another way of creating it. If the team is unsure whether a job already exists, search the reference and vehicle information first. Preventing a duplicate is easier than untangling two versions after dispatch, billing, or payment. Open Loads again and select Active Board. Find the driver and inspect the days relevant to this job. The board connects planning with existing work. Look at scheduled pickups and deliveries, the assigned equipment, and capacity. A day with room on the trailer is a starting point for review, not a guarantee that the route and appointments are workable. Use Spots Today and Unassigned Loads to understand the work that still needs a decision. Review drivers' schedules and any Not Working information before adding another commitment. Capacity, availability, vehicle condition, route, and appointment times all belong in the same planning conversation. Do not make the assignment from one attractive number while ignoring the rest of the record. When you review a route, consider the whole sequence of stops. Ask whether the pickup order, delivery order, and timing make sense for the equipment and driver. A map is useful context, but it is not a replacement for the team's operating judgment or the driver's required planning. Resolve an obvious conflict before sending instructions to the phone. Open the primary load and review Driver and Dispatcher. Select the intended driver and the responsible dispatcher. Check the truck information resolved from assignment history. If the date has no usable truck assignment, investigate that history instead of choosing a different person just to remove the warning. The assignment needs to reflect who will actually perform the work. Save the assignment and wait for the load to show the selected driver. Then return to the board and confirm the planned work appears where expected. If the driver changes before pickup, review the resulting state carefully. A reassignment can require the work to be sent again; the new person's access should not be assumed from the previous person's release. Open the load from the board. Once the information is confirmed, follow the available readiness action and select Send to driver. Read the confirmation and make sure the intended driver and job are correct. Assigning the driver prepared the plan. Sending the load is the handoff that makes eligible work available under the company's Driver App policy. Wait for the result, then check the load's state. Do not use the button click alone as proof that release succeeded. A missing assignment, permission, or required detail can prevent the handoff. Read any message, correct the relevant source through the normal workflow, and confirm the resulting record before telling the driver that the job is ready. Now move to the Driver App and open My Loads. Find the same load reference. Verify that the route and vehicle match the job released by the office. This is the handoff check: the right person can see the right work. The next part follows this same job through pickup and delivery. Pause after the office has assigned the load. Imagine the driver says that the job is missing from My Loads. Which fact should you check first? Open the load and inspect its readiness and release state. The assigned driver's name tells you who is planned to do the work. It does not by itself prove that the handoff completed. Then compare the driver on the load with the profile connected to the phone login. Check the company's visibility policy and the current job stage. Work that has not reached the permitted stage may remain hidden. Changing random settings or repeatedly assigning the same person is not a reliable way to diagnose the missing job. The answer is a short chain: correct record, correct driver, correct account connection, eligible state, confirmed release. When the office uses Send to driver, wait for its result. On the phone, find the same load reference and read the route and vehicle. That last check proves that both sides are looking at the same work. Before moving on, explain the handoff in one sentence: this job is accurate, assigned to this driver, and visible in that driver's app. If you cannot say which record or result supports one part of the sentence, that is the next item to investigate. Keep the explanation specific enough that another dispatcher can continue it. Here is the practice question. The load has a driver, the dates look correct, and the board shows the planned work, but the driver cannot find it. What has not yet been proved? The release. Check whether Send to driver completed, whether the account is linked to the intended Driver profile, and whether the company's visibility policy allows that stage of work. Our dispatch handoff is complete when the saved load is accurate, the assignment reflects the operating plan, and the intended driver can open the released work. The next part follows that driver through pickup, condition evidence, communication with the office, and delivery. Watch how each new fact changes the same load record rather than creating a separate version of the job. The office has released our sample load to the driver. Now we change perspective. Open the Driver App to review the job, record pickup evidence, and follow it through delivery. We will also return to the office to check what arrived there. The handoff is complete when the next person can see the information they need. Open TruckTA on your phone and sign in with the email address connected to your company invitation. Check the company and driver name on your account. If you are using the wrong login or cannot reach the expected workspace, ask your company to review the account connection before you begin working on a load. Sign in with the invited driver email for Adrian Cole. TruckTA checks the company, driver access, and allowed actions before Home opens. If the app reports an expired invitation or unavailable access, resolve that account issue before continuing. The driver should see only the company and work assigned to that account. Home is the driver’s starting point. It can show a next-action card, active-load count, document attention, and location readiness. The card opens the assigned load; it does not change the load status by itself. Read the current state before choosing the next action. Open My Loads from the native bottom navigation. The current phone navigation is Home, My Loads, Map, Pay, and More, although Pay is omitted when the company disables Driver Pay. My Loads presents assigned work and a weekly delivered history shaped by the driver’s permissions. Select RL-TRAIN-1001 only after confirming the visible load identifier. The load detail presents pickup and delivery in one route timeline. Each stop groups its date, street or company information, contact, and instructions. Read the pickup address and instructions first, then the delivery destination. A driver should know which stop is next before opening an inspection or changing a milestone. Never infer an address from a map pin alone. Read the pickup instructions on the assigned load and check the contact details before you arrive. Find this job's BOL, photos, and other load attachments from the load itself. Your driver and assigned-equipment documents are a separate collection: open More, then My documents. Keep those two places distinct when you are looking for a file. Open the vehicle card and compare the displayed VIN for the hauled car with the VIN on RL-TRAIN-1001. This is a verification step, not permission to create a new billable vehicle from the phone. If the car is missing or the VIN does not match, record the exception and send it back to dispatch for correction. The company’s Driver App policy shapes which loads and actions appear. New and Ready may remain hidden until dispatch releases the vehicle, while a released vehicle can appear Ready to pick up. The exact status labels come from company settings. If expected work is missing, ask dispatch to review the release and your access. When vehicle inspections are enabled and the load is eligible, open the guided pickup inspection from the vehicle card. The inspection feature is company-wide and default-off; the owner accepts the active TruckTA Standard eBOL Terms before enabling it. The native workflow guides the driver through the required evidence. Begin with the pickup VIN step and follow the native scanner or manual entry path shown by the app. Review the returned identity before continuing. A successful VIN check anchors the report to the correct vehicle. If the scanner cannot read the VIN, use the approved manual fallback and resolve the exception before continuing. Move through the guided camera prompts and required vehicle views. Our training emulator displays a camera preview but saves black images. That failure is logged. The remaining report screens are synthetic demonstrations of the controls, not valid inspection evidence. On a real job, stop, retake the photos, or follow the company's approved fallback before signing. From Photo evidence, select Continue to open Vehicle condition. Enter the observed odometer reading and choose whether the vehicle is drivable. Our fictional sample uses twelve thousand three hundred forty-five miles and Yes. Review the remaining condition and loose-item fields, including any marked required. Scroll to Continue only after checking the answers. On real work, record what you actually observe. From the condition review, open Mark damage on the diagram. Choose the damage type and tap the vehicle area. Then open the issue details to check its location, severity, note, and linked photo. On a real inspection, attach clear supporting evidence and any required close-up. The report records observations; it does not decide liability or insurance coverage. Before signing, review the VIN, odometer, keys, condition answers, issues, photos, and required checks. The driver reviews the same frozen report that the representative will review. A report-specific signature is tied to this load phase and version. The app does not use a separate consent checkbox; the signing notice expands to the applicable terms and report summary. The actual driver signs the pickup report and provides the printed name requested by the screen. A driver may save their own drawn signature for a later one-tap choice, but still reviews each report before using it. Do not sign for another person or use someone else's saved signature. The representative is a separate participant. They review the same report and either sign with their role and printed name or record that they are unavailable or decline with the standard reason. The driver does not sign on another person’s behalf. Use company-approved wording and the exact choice offered by the app; do not add a legal interpretation to the narration. When the final visible signature lands and every required vehicle phase is complete, the app can finish the report automatically. It creates the signed PDF and confirms the matching pickup milestone when every requirement passes. Wait for the visible result. Signing alone is not proof that the load status changed. If the app presents a collection or milestone sheet, read the available choices before selecting one. A company-enabled driver collection can record amount, time, method, reference, and notes, but collection is a separate capability and financial write. If payment is missed, the driver must provide the requested reason. A failed automatic finalization or milestone step should show a retry row or an explanation of why the action is unavailable. Read that state instead of tapping repeatedly. The signed report may already be complete while the milestone remains unrecorded; the load screen can then offer the product’s documented finish action. Never announce success from a spinner or a stale banner. Return to the load detail and look for the signed BOL banner and the recorded milestone. Use the available View or Share action to open the report. The document records this inspection; it does not let you edit sealed evidence. A completed signed phase stays locked. Corrections must follow the supported staff process. On the staff website, open Loads and select this job. In BOL, select Pickup to inspect that phase's signed report. You can return to this evidence after the job has progressed. Then open Activity to review the recorded events. Confirm what completed, what remains pending, and who owns any exception. A driver's message alone does not replace the recorded evidence. Switch back to the staff website and open Live Map. Select Adrian’s driver row and read the freshness label, timestamp, and status. A last-known point can be delayed, stale, unavailable, duplicated, or inaccurate. It is operational context, not a guaranteed current position or delivery estimate. Use Live Map to understand visibility and freshness, not to promise an arrival time. Buildings, weather, device permissions, network conditions, battery controls, and offline delivery can affect location. If the map says stale, say stale. The correct handoff is to contact the driver through the approved process or use the load’s recorded instructions, not to invent a precise ETA. At delivery, the inspection opens only after the pickup phase is complete for that vehicle. The delivery workflow carries forward the pickup VIN, odometer, keys, condition answers, and prior issue marks as read-only context, while fresh delivery photos remain mandatory. This comparison helps the team distinguish pre-existing issues from new or changed evidence. Follow the delivery prompts and capture the required evidence. Review the pickup reference beside the fresh delivery evidence, then record any new, changed, pre-existing, resolved, or not-observed issue the screen supports. When nothing new or changed is present, use the product’s no-new-damage path after reviewing the visible facts. The driver and the separate representative review and sign the delivery report version. The report remains blocked until required vehicle phases, evidence, signatures, and the active company terms are satisfied. A declined or unavailable representative is recorded with the offered reason. Do not describe the signature as a liability or coverage decision; it records review of the report facts. After finalization, read the delivery milestone result and the signed BOL banner. A failed automatic step shows its retry state. The BOL includes the delivery report and pickup comparison, and the public link exposes only the safe report surface. If the load is warehouse-routed, the local driver confirms delivery to the warehouse and the outbound driver completes the final customer leg. When connectivity fails, the Driver App can keep permitted actions and photos queued on the device. A queued or starting state is not confirmation that TruckTA accepted the change. Access, assignment, validation, and conflict errors remain visible and require correction. Wait for the confirmed result before telling dispatch that pickup or delivery is complete. If the app returns after a disconnect, refresh the load and compare the displayed state with what you saw before. Do not replay a status or signature blindly. The app may reconnect and retry a failed load, while a signed report still refuses an outdated change. Escalate an unresolved conflict with the load ID and visible error. Pause on the photo review. Imagine that the counter says two photos are saved, but one image is black or too blurred to identify the vehicle. Is the evidence ready? No. The count describes stored items, not their usefulness. Open the image and inspect what it actually shows before treating the photo step as complete. Check that each image belongs to the intended vehicle and shows the requested area clearly. At delivery, compare the new evidence with the pickup baseline. A close-up without context may not explain where an issue is located. A clear label, the correct view, and the related condition entry should tell one consistent story. If a capture is unusable, retake it. If the capture problem persists, report it and follow the company's approved fallback rather than signing a report that you cannot support. A pending upload also needs attention. A picture on the local screen and a confirmed image available to the office are different points in the handoff. The answer pattern is identity, quality, completeness, and confirmation. Verify the vehicle, inspect the image, review the required views, and confirm that the office can access the result. Apply the same discipline to documents and signatures. A completed-looking screen is helpful, but the evidence behind it is what the team will need later. Start with the correct driver account and assigned job. Verify the vehicle, review the inspection evidence, and record the driver signature and the representative's response. Wait for the report and milestone to finish, then confirm that the office can see the result. At delivery, compare against pickup. Offline work still needs confirmation after reconnecting. Leave the next person a clear, verified handoff. Open Loads from the sidebar and select the primary training load. Before discussing money, confirm its reference, vehicle, driver, and actual delivery date. Open BOL and Files to review the supporting delivery evidence. Accounting needs an identifiable completed job and the right paperwork, not simply a message that someone remembers delivering the vehicle. Then open Money. The agreed amount is one thousand two hundred dollars. Keep four facts separate: the job's physical progress, its payment terms, its invoice evidence, and its recorded payments. A Delivered load can still need an invoice. An invoice can still be unpaid. The screen helps you identify the next financial action from those facts. Check the payer as well as the payment terms. Bill To must identify the customer or broker you will invoice. A typed broker name alone may not link a saved contact. If Bill To is missing, open Overview, edit Broker and Agent, choose the saved contact, and save. Return to Money and confirm the billing details. Return to Loads and open To Invoice. This queue helps the office find eligible work that still needs invoice evidence. Open the job you intend to bill and verify the amount and documents. If the expected job is missing, check its delivery information, terms, and existing invoice history before creating another invoice somewhere else. Finance Center gives accounting another route into the same work. Open Finance Center from the sidebar, then Accounts Receivable. Compare the selected date range and view before comparing totals between screens. A different period or filter can explain a different total. Open the underlying load when you need to understand one particular balance. For an invoice prepared in TruckTA, use the available Create Invoice action and review its draft. Confirm the bill-to details, load reference, service information, amount, and attachments. Invoice settings and your permissions control the available actions. The person responsible for billing should review the draft before it is issued or sent. This draft has not been sent. To demonstrate the other billing route, discard it. For an invoice issued outside TruckTA, choose Record Invoice. Enter the invoice reference, amount, date, and delivery method. Our fictional example uses Handed over. Saving this record documents external billing; it does not send an email or collect money. After an invoice is issued or recorded, inspect the result. Confirm that the reference belongs to this job and that the appropriate queue reflects the next step. A preview is not a sent invoice. If an operation reports an error or remains incomplete, check the record before repeating it to avoid duplicate billing evidence. Open the load's Money tab and choose Record Payment. Start with the amount received, its date, method, and reference. For our example, enter five hundred dollars against the one-thousand-two-hundred-dollar balance. Read the confirmation before saving. This records receipt of money; it does not send a bank transfer or collect money from the customer. Wait for the saved result and review the payment history. The first collection should be five hundred dollars, with seven hundred dollars remaining. Check the job reference and amount together. If the page takes time to update, inspect the history before entering the same payment again. A second entry would describe another receipt of money. Return to Accounts Receivable, then open Outstanding Payments and find the same job. Its remaining balance is seven hundred dollars. Read the due date and any exception separately from that amount. An open balance is not necessarily overdue. A dispute or hold needs a clear follow-up decision, so check the underlying record before changing its payment state. When the remaining seven hundred dollars is received, return to this load and record that payment once. Confirm the date, method, and reference for the second receipt. After saving, the history should show two collections: five hundred dollars and seven hundred dollars. Together they cover the one-thousand-two-hundred-dollar customer amount. Check that the balance is zero and review the resulting payment state. When a correction exists, read its original entry and reversal together; use the net collected total to check the balance. This completes the customer collection example. It does not approve a driver settlement or change what happened at pickup and delivery. A C O D or C O P job follows a different collection timing. Cash on delivery is collected at delivery; cash on pickup is collected at pickup. Whether a driver can record that collection depends on the company's Driver App permission and enabled methods. Review the load's instructions before the driver reaches the collection point. When the driver records a collection, the office still needs to handle any required cash or check reconciliation. Money collected from the customer and money handed to the office are different events. Do not charge the customer again because the office has not received the driver's cash. Review the existing collection record and the outstanding handoff. If the driver could not collect a required payment, record the truthful reason through the offered workflow and notify the responsible person. Do not record money that was never received just to finish a delivery screen. The physical work and the missed collection need to remain understandable as separate facts when accounting follows up. From the sidebar, open Finance Center, then Fuel. Use Overview for totals and Transactions for normalized purchases. If no provider data has been imported, the page says no fuel imports yet. Use Import Fuel for an approved provider CSV or PDF, then review the normalized transaction, driver, date, truck assignment, and any issue before relying on totals. Fuel remains a cost record, never customer payment. To record a load-linked expense, open the load's Money tab and choose Add expense. Enter what was paid for, amount, optional category and date, payer, payment method, and a receipt from the load files; review the billable-to-customer option before saving. Then use Finance Center > Expenses to review the saved load, payer, broker reimbursement, driver or owner reimbursement, invoice, and comments. Keep one receipt as one record. A fuel transaction should not be re-entered as a load expense simply to make it visible in another place. Review the receipt selector and customer-billing choice before saving, then use the Expenses ledger to check the payer and reimbursement state. A company cost does not automatically become a driver deduction; the expense record and compensation agreement answer different questions. Open Truck Summary in Finance Center and select the truck and period you are reviewing. Trace a surprising amount back to the delivered loads and cost records behind it. Confirm the actual delivery date and the assignment covering that date. Today's driver-truck relationship is not enough to explain a job delivered under an earlier assignment. Use Truck Assignment Check when a delivered load cannot be matched to the expected truck. Read the reason and inspect assignment history. A missing match can leave work out of truck or owner-fleet totals even though the company's revenue and receivable still exist. Correct the underlying dates through the reviewed assignment workflow, then check the result again. Open Finance Center, then Driver Settlements. In Pay run, choose the correct Monday-through-Sunday week and select the driver. Check the load lines and actual delivery dates. Our sample load has one thousand two hundred dollars gross, and the applicable percentage rate is twenty-five percent. That produces three hundred dollars before deductions and adjustments. Customer payment timing and the driver's compensation calculation are separate. The customer balance reaching zero does not approve this pay run. Review the effective compensation and delivered-load basis, then inspect deductions or additions required by your company's agreement. Do not use the customer's unpaid balance as an unexplained change to the driver's rate. For an adjustment, select the appropriate addition or deduction, enter its amount and date, and use a clear description. Read the calculation before adding it. Check the repeat setting carefully. A one-time expense should not become a weekly deduction by accident. Our basic example stays at three hundred dollars so the calculation is easy to follow. Select Save draft after checking the period, driver, load lines, rate, and adjustments. Saving freezes those details into a draft snapshot. Reopen the saved draft and confirm its totals. A saved draft is ready for review; it is not an approved statement and it is not evidence that the driver has been paid. If a relevant rate or assignment changes afterward, an affected draft can be marked outdated. Use Update draft, review the rebuilt result, and only then continue toward approval. Do not assume an earlier screenshot still represents the current draft. Approved and paid snapshots remain separate historical records rather than silently recalculating with later changes. An authorized reviewer selects Approve after checking the statement. Read the confirmation and wait for the approved result. Later, when the company actually pays the driver, use the settlement payment action to record that event. The amount in our unchanged example is three hundred dollars. It is separate from both customer payments we recorded earlier. Return to the point after the first customer payment. Our load amount is twelve hundred dollars and the first receipt is five hundred dollars. What should remain outstanding? Seven hundred dollars. Now ask a different question: what is the driver's percentage pay before adjustments? At twenty-five percent of twelve hundred dollars, the answer is three hundred dollars. Those two answers are different because they describe different facts. The customer's remaining balance is not the driver's compensation basis in this example. Likewise, a three-hundred-dollar approved driver statement does not prove that the customer paid anything. Find the customer payment history and the driver settlement separately, then identify the record that supports each amount. After the second customer receipt, check that five hundred plus seven hundred covers twelve hundred. Review the two entries, the dates and references, and the remaining balance. Then return to the saved settlement and check its week, load lines, rate, and adjustments. Record driver payment only when the company has actually made that payment. The answer pattern is simple: explain every number by its source. The load explains gross. Collection history explains receipts. Expense records explain costs. The compensation and settlement records explain driver pay. When a total is surprising, trace those sources instead of changing a label until the screen looks right. That is how the team keeps a closeout understandable. Open Statements and select the saved statement for this driver and week. Review the net amount, load lines, adjustments, approval, and payment details. Open the statement document and check that it describes the same period. A statement is useful because the team can return to the saved record and explain how the amount was reached. Switch to the driver's permitted Pay view and find the statement. Confirm that the driver can recognize the period, status, amount, and supporting details. The live weekly estimate and saved settlement are different views. A driver who can view a statement does not thereby receive permission to create, approve, or edit the company's settlement records. Our finance handoff now has a clear answer for each question. The delivered job has supporting evidence. Its invoice history is recorded. Two customer payments cover the twelve-hundred-dollar balance. Costs have their own records. The separate three-hundred-dollar driver settlement has been reviewed. Identify any unresolved item by record, reason, and the person responsible for the next step. An owner-operator can touch the same company operation through more than one authorized workspace. TruckTA keeps company staff, Owner Portal members, and Driver App links distinct so each person sees the records their current access permits. We will use Riley Bennett as a separate example and keep the Bennett fleet boundary visible throughout the handoff. Open Settings from the sidebar. Under People and access, select Owner Fleets to reach Owner Fleet Setup. Choose the fleet you intend to review, then check its identity, equipment, and access. This is the staff workspace for maintaining the relationship; the owner's portal is a separate view we will open after those details are clear. Owner Portal access and the Driver App connection are separate settings on a person's company login. A fleet owner who does not drive may need only the portal. An owner who also drives may need both. Review the fleet, driver record, and selected role before completing the setup so each workspace opens for the right purpose. Drivers appear with a fleet through their truck assignments. Review who drove the truck and when, then check when that truck belonged to the owner fleet. Those dates explain where a delivered load belongs. If a relationship is missing or needs review, correct the dated assignment through the staff workflow rather than trying to add the driver directly to a fleet list. Open the authorized Owner Portal entry and confirm that it is scoped to the selected fleet. The portal has its own navigation and record limits. Check the company and fleet name before reviewing any record. The portal’s access boundary controls what this person can see. Open Loads in the Owner Portal and find the example job. Check the selected week, driver, and load reference. The owner sees the work within the fleet's permitted scope. If an expected job is missing or needs assignment review, return the question to company staff with the load reference and delivery date so they can inspect the relationship. Open the approved driver or equipment detail in the selected fleet. Owner uploads are limited to enabled document types and records assigned to the owner’s fleet. Required types, expiration dates, and Data Health findings follow the company’s rules. A Viewer remains read-only, while upload rights depend on the fleet role and company settings. The staff role prepares the load and access context; the owner-operator works from the Driver App and Owner Portal access they hold. Explain which workspace owns the next action before handing it off. A portal view does not change a driver’s assignment, and an invitation is not accepted until the account shows it. Open the owner settlement view and verify the fleet, load, driver, and dates. Read the amounts and determine whether you are looking at a live estimate or a saved statement. Approved and paid settlement snapshots remain unchanged by later assignment corrections. Live estimates can change, and affected drafts may need Update draft before approval. A driver can work a load without being the fleet owner, and a fleet member can view scoped financial information without receiving staff permissions. Keep role, fleet membership, driver linkage, and load assignment as four separate questions. This is the practical guardrail for mixed fleets: every handoff names the person, workspace, fleet, and record being discussed. Owner Portal Data Health is fleet scoped. It covers active drivers and active equipment derived from current fleet relationships, with missing or expiring requirements shown through the shared evaluator. It does not replace company-wide staff review, and it does not include every inactive or historical record. Use it to prioritize a correction, then send the owner to the correct staff workflow when access is limited. Pause in the Owner Portal and identify the company and fleet being reviewed. Which loads, drivers, equipment, and statements should this person see? Start with the fleet relationship and the selected time period. A company-wide total and a fleet total answer different questions, so their numbers do not have to match. Now imagine that the fleet owner also drives one of the trucks. Does portal access automatically give that person Driver App access? No. The driver connection is a separate relationship. Review both when setting up an owner-operator, and confirm the intended workspace after signing in. One account can serve two responsibilities without combining their permissions. For documents, consider what the owner needs to do. A person who only needs to read financial and operating information should not receive extra editing access merely for convenience. Upload controls depend on the portal role and the company's document rules. When a required document cannot be uploaded there, the owner should hand it to the responsible company staff member. The answer pattern is scope, role, and next action. Identify the fleet, confirm the permitted role, and route the task to the right person. If a load or document is missing, review the relevant dates and assignment before assuming the portal lost it. End with a named record and a clear next step, so the handoff can be completed. For owner-operators, start with explicit access, confirm the fleet boundary, follow assignment history, and hand off through the correct workspace. Keep owner settlement values source-driven and unguessed. When scope is ambiguous, stop and review the assignment history or access relationship. We have followed the main job from dispatch through delivery and financial review. This final part covers work that needs another route: warehouse stops, imports, document review, AI assistance, and operational follow-up. For each one, identify the record, the unfinished step, and the person who should act next. That turns a busy list into a usable handoff. If the company uses warehouse-routed loads, open the warehouse route from the load workflow. A local driver may deliver to the company warehouse while an outbound driver completes the customer leg. Treat the warehouse receipt and final delivery as distinct milestones, and never describe the warehouse handoff as a customer condition inspection. Read the route, custody milestone, and unfinished work before changing a warehouse setting or local-pay value. Sensitive changes require the right permission and a review of the current record. Do not change a warehouse policy, local-pay amount, invoice setting, or route unless the company has approved that action. For Smart Document Intake, open the staff upload entry point from the record that owns the document. Analysis creates a private review draft. Inspect the evidence, correct the proposed type or owner, and choose whether to apply it or continue manually. AI does not create a driver, load, assignment, payment, or status by itself. Smart Intake accepts supported document and image formats within its file, page, and batch limits. Use the existing manual import workflow for office files and spreadsheets. An unreadable or password-locked document needs manual attention. Review uncertain values yourself, and keep the document visible only to people authorized to work with it. Select Ask TruckTA in the staff workspace. Start with a focused question, such as how to review unpaid loads, and read the supporting guidance. Open the relevant page to inspect the records. When AI prepares a supported action, review the selected record and proposed change before confirming. An answer or prepared draft is not the same as a saved business action. Driver App and Owner Portal do not expose staff AI chat, Smart Review, or AI document intake. Their document flows use known types and the normal upload controls. The Driver App scanner is a local capture tool, not an AI analyzer. Route staff intake and staff AI questions back to the staff workspace. Open AI Communications settings or its readiness view when your company has enabled the feature. Review provider health, company switches, permissions, consent, and spend limits. This training does not place a call or send a text. A configured number or prepared plan is not evidence that a real recipient was contacted. For communications, confirm that the company has enabled the intended channel and that the connection is ready. Review the recipient and proposed content before delivery. If the screen reports a connection problem, keep the communication pending and follow the company's approved fallback. A prepared call or message is not proof that the recipient has been reached. Open Data Health from the sidebar. Select a finding and identify the affected driver, equipment, or document. Read what is missing or needs attention, then open the source record. Checking a list is the beginning of follow-up. The issue is resolved by correcting the underlying information or supplying the required evidence, not by assuming that a better-looking total means the work is done. Open Action Center to organize operational findings. Review the current workflow, assignee, severity, and category filters. Open a finding's source and history, then use the appropriate review, assignment, or deferral action. Dismissing a finding does not repair the underlying record. The Owner Portal has a narrower fleet view, so its findings will not always match the company-wide list. Open Audit Readiness from the sidebar when the team needs an evidence check. Read the current findings and source records, then identify who should handle the next review. Do not call a checklist complete because a page loaded. Audit Readiness helps organize the review; it does not itself create documents, approve settlements, or determine a legal outcome. At the end of the day, hand off exceptions with five facts: record, current state, evidence checked, blocker, and owner of the next action. Use the load, driver, equipment, fleet, document, or provider record that proves the statement. This makes a short message useful without turning an assumption into an operational fact. The full operation connects preparation, dispatch, driver work, finance, and owner-operator scope. The exception habit keeps optional workflows honest: warehouse steps are separate milestones, AI intake is review-first, staff AI is permission-shaped, communications need current provider health, and Data Health points to corrections. When the evidence is missing, the professional action is to stop, name the gap, and route it to the right team.
Put it into practice
Keep your operation moving with TruckTA.
More ways to use TruckTA
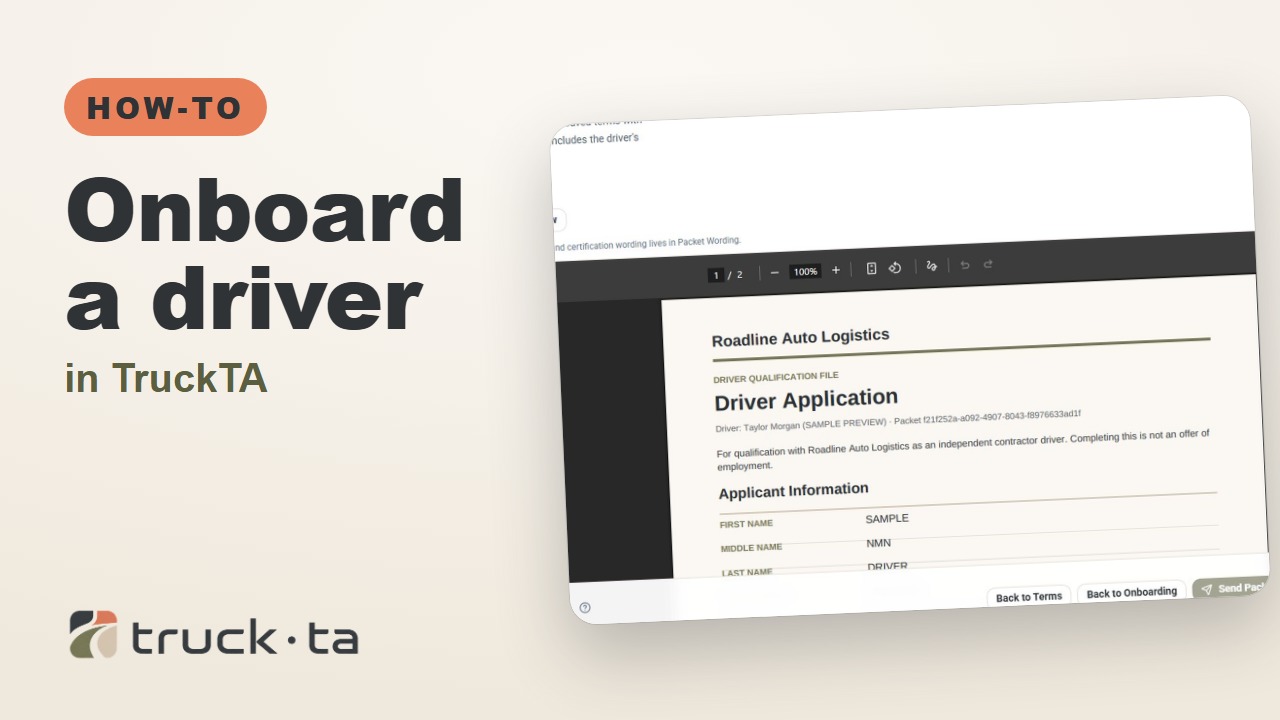
Onboard a Driver in TruckTA
Follow the TruckTA video to prepare an applicant packet, check company-approved terms, and preview the documents. Then see how submission, review, signing, and the Driver record fit together.
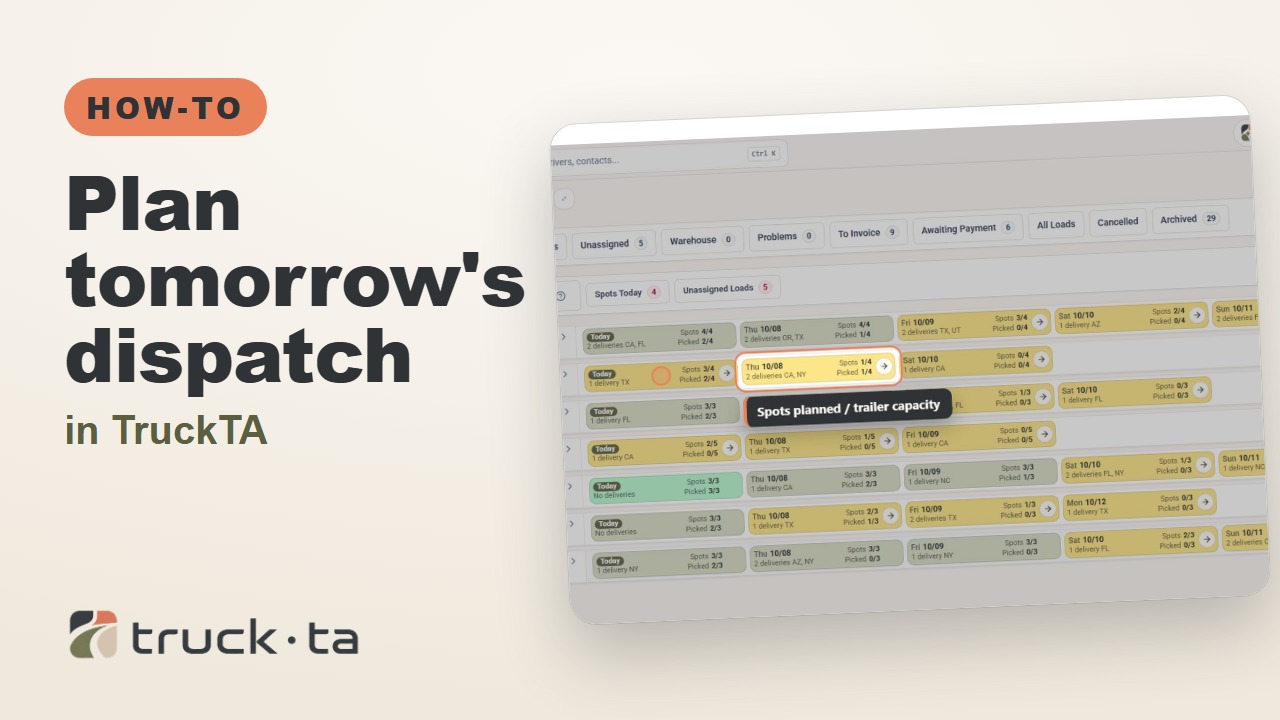
Plan Tomorrow's Dispatch in TruckTA
Review planned work, tomorrow’s open trailer spots, unassigned loads, and driver availability in TruckTA before assigning the next load.
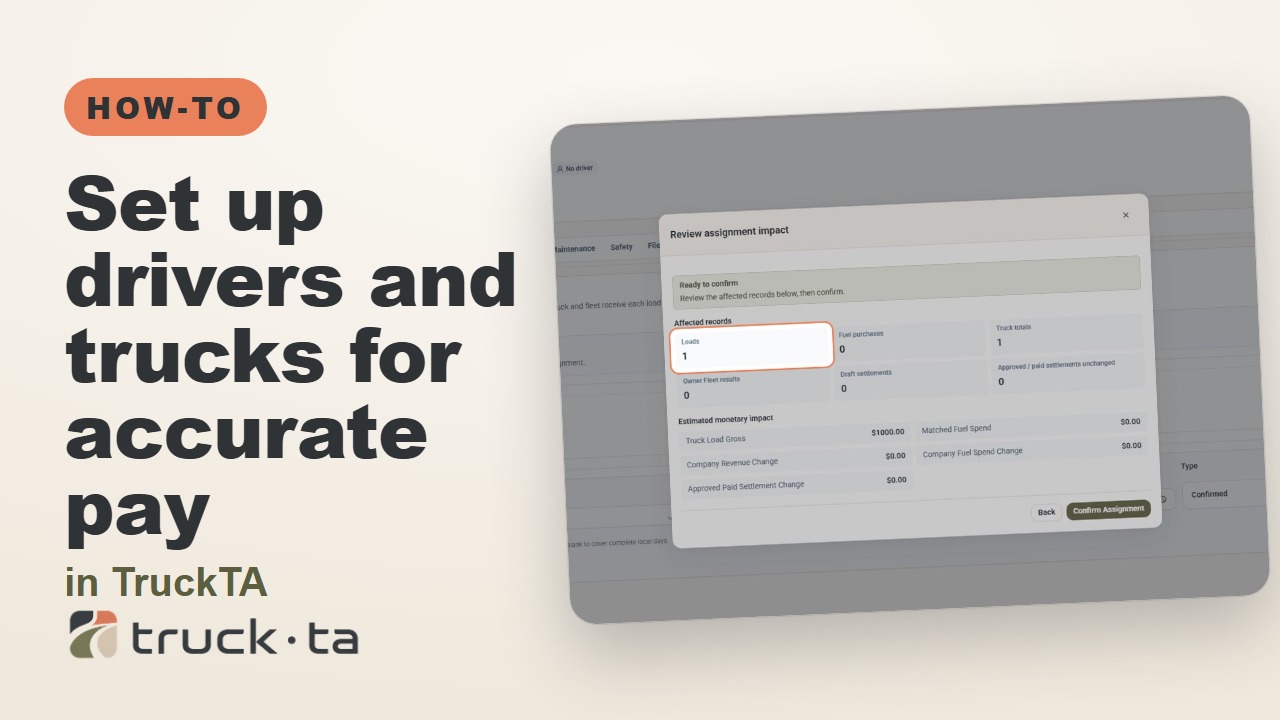
Set Up Drivers and Trucks for Accurate Pay in TruckTA
When driver pay or truck totals look wrong, check the records behind the delivery date. Follow the video’s workflow for load details, dated compensation, truck assignments, owner fleets, and saved settlements.